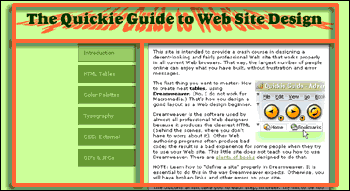
Try to figure out what you are looking at on this page. The layout here is an HTML table (no frames are used). This table has two rows (a row in HTML is tagged TR). The row at the top has one cell, which goes all the way across the table from left to right.
The second row (the only other row this table has) is right here where your eyeballs are focused. This row has two cells (a cell in HTML is tagged TD). The cell on the left side contains all the buttons. The cell on the right contains this white box full of text. You might think of these two cells as two columns.
 Using
Dreamweaver, there are two simple steps to creating a table
on your Web page:
(Step 1) Click the Table icon in the selection bar at the top of the Dreamweaver application window ("Common" icons are showing).

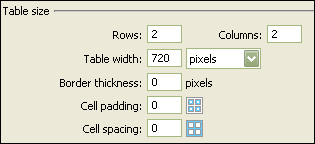
(Step 2) Select the full number of rows and the full number of columns (cells) you will need. A table width of 720 pixels is ideal for maximum compatibility. Set all other specs to zero. Click OK to place this table framework on the page. (In some cases, you may use a width of 100 percent for your table instead. But only if it's necessary.)
By placing all elements (headings, images, blocks of text, buttons, etc.) on your Web page inside tables, you can control where they appear.

HINT: Keep it simple! Never try to create a table with dozens of cells, or one cell to hold each element on your Web page. Instead, think about chunks of content. On this page, the stack of buttons on the left side is one chunk, or collection -- so the whole stack is all inside one table cell.
Most Web pages can be accommodated in a 2 x 2 or a 3 x 3 table.
To combine two or more adjacent cells (either horizontally or vertically adjacent) into one, select the cells and then press the M key ("m" for "merge"). This assumes you are using Dreamweaver.
> For some diagrams of simple table layouts, see Resources for Web Workers and click the right-hand side link to "Web Page Design."
> Return to the syllabus schedule page.

