Adjusting the Controls |
|
The recording balance controls for most Windows computers can be found by opening the volume controls. The specific menus and buttons will vary, because different computers have different sound cards installed, and the software is usually specific to the sound card. |
|
|
|
|
|
|
|
|
Right-click on the Volume icon (lower right corner of the Windows desktop) and select Adjust Audio Properties. |
|
|
|
|
|
Depending on your sound software, you may not see the same pop-up menu -- but you will get access to the recording controls through the Volume icon. (You may need to open something called "Mixer" instead of "Audio Properties," for example.) | |

|
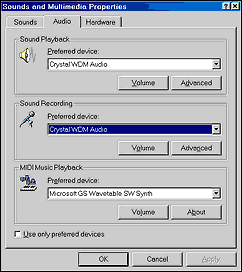
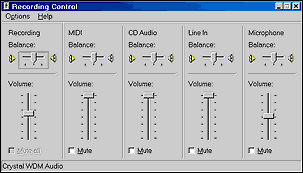
The Properties dialog box looks like this in Windows 2000 (with a Crystal Audio card). You can check the recording balance controls by clicking the Volume button in the part of the box labeled "Sound Recording." Hear how to adjust the Recording Balance and the Microphone Balance on the Recording Control panel (click the Play button on the player below): If you don't see a player above, you'll need to download the RealPlayer plug-in to hear the sound clip. |

|
If you can't find a Recording Control panel like the one at left, open whatever kind of large volume control panel you can find on your system and go to the Options menu. On the Options menu, look for a choice named "Properties." In the Properties dialog box, select "Recording" or "Recorder." Make sure that all controls for microphone and recording are set at the mid-level, and make sure that "Mute" is NOT checked. |
![]()